Build a template in the editor
Edit wording in place, add blocks, place fill-ins and decide who signs.
5 sections · 5 screenshots
A template holds your wording, layout and signature blocks. Every new document starts as a copy of it. New companies get three templates to start from: a Consulting Agreement (SOW), a Mutual Non-Disclosure Agreement and an Order Form.
Open a template
- Choose Templates in the sidebar.
- On a template card, choose Edit to change the template itself, or Use template to start a new document from it.
- To start from a blank page, choose New template.
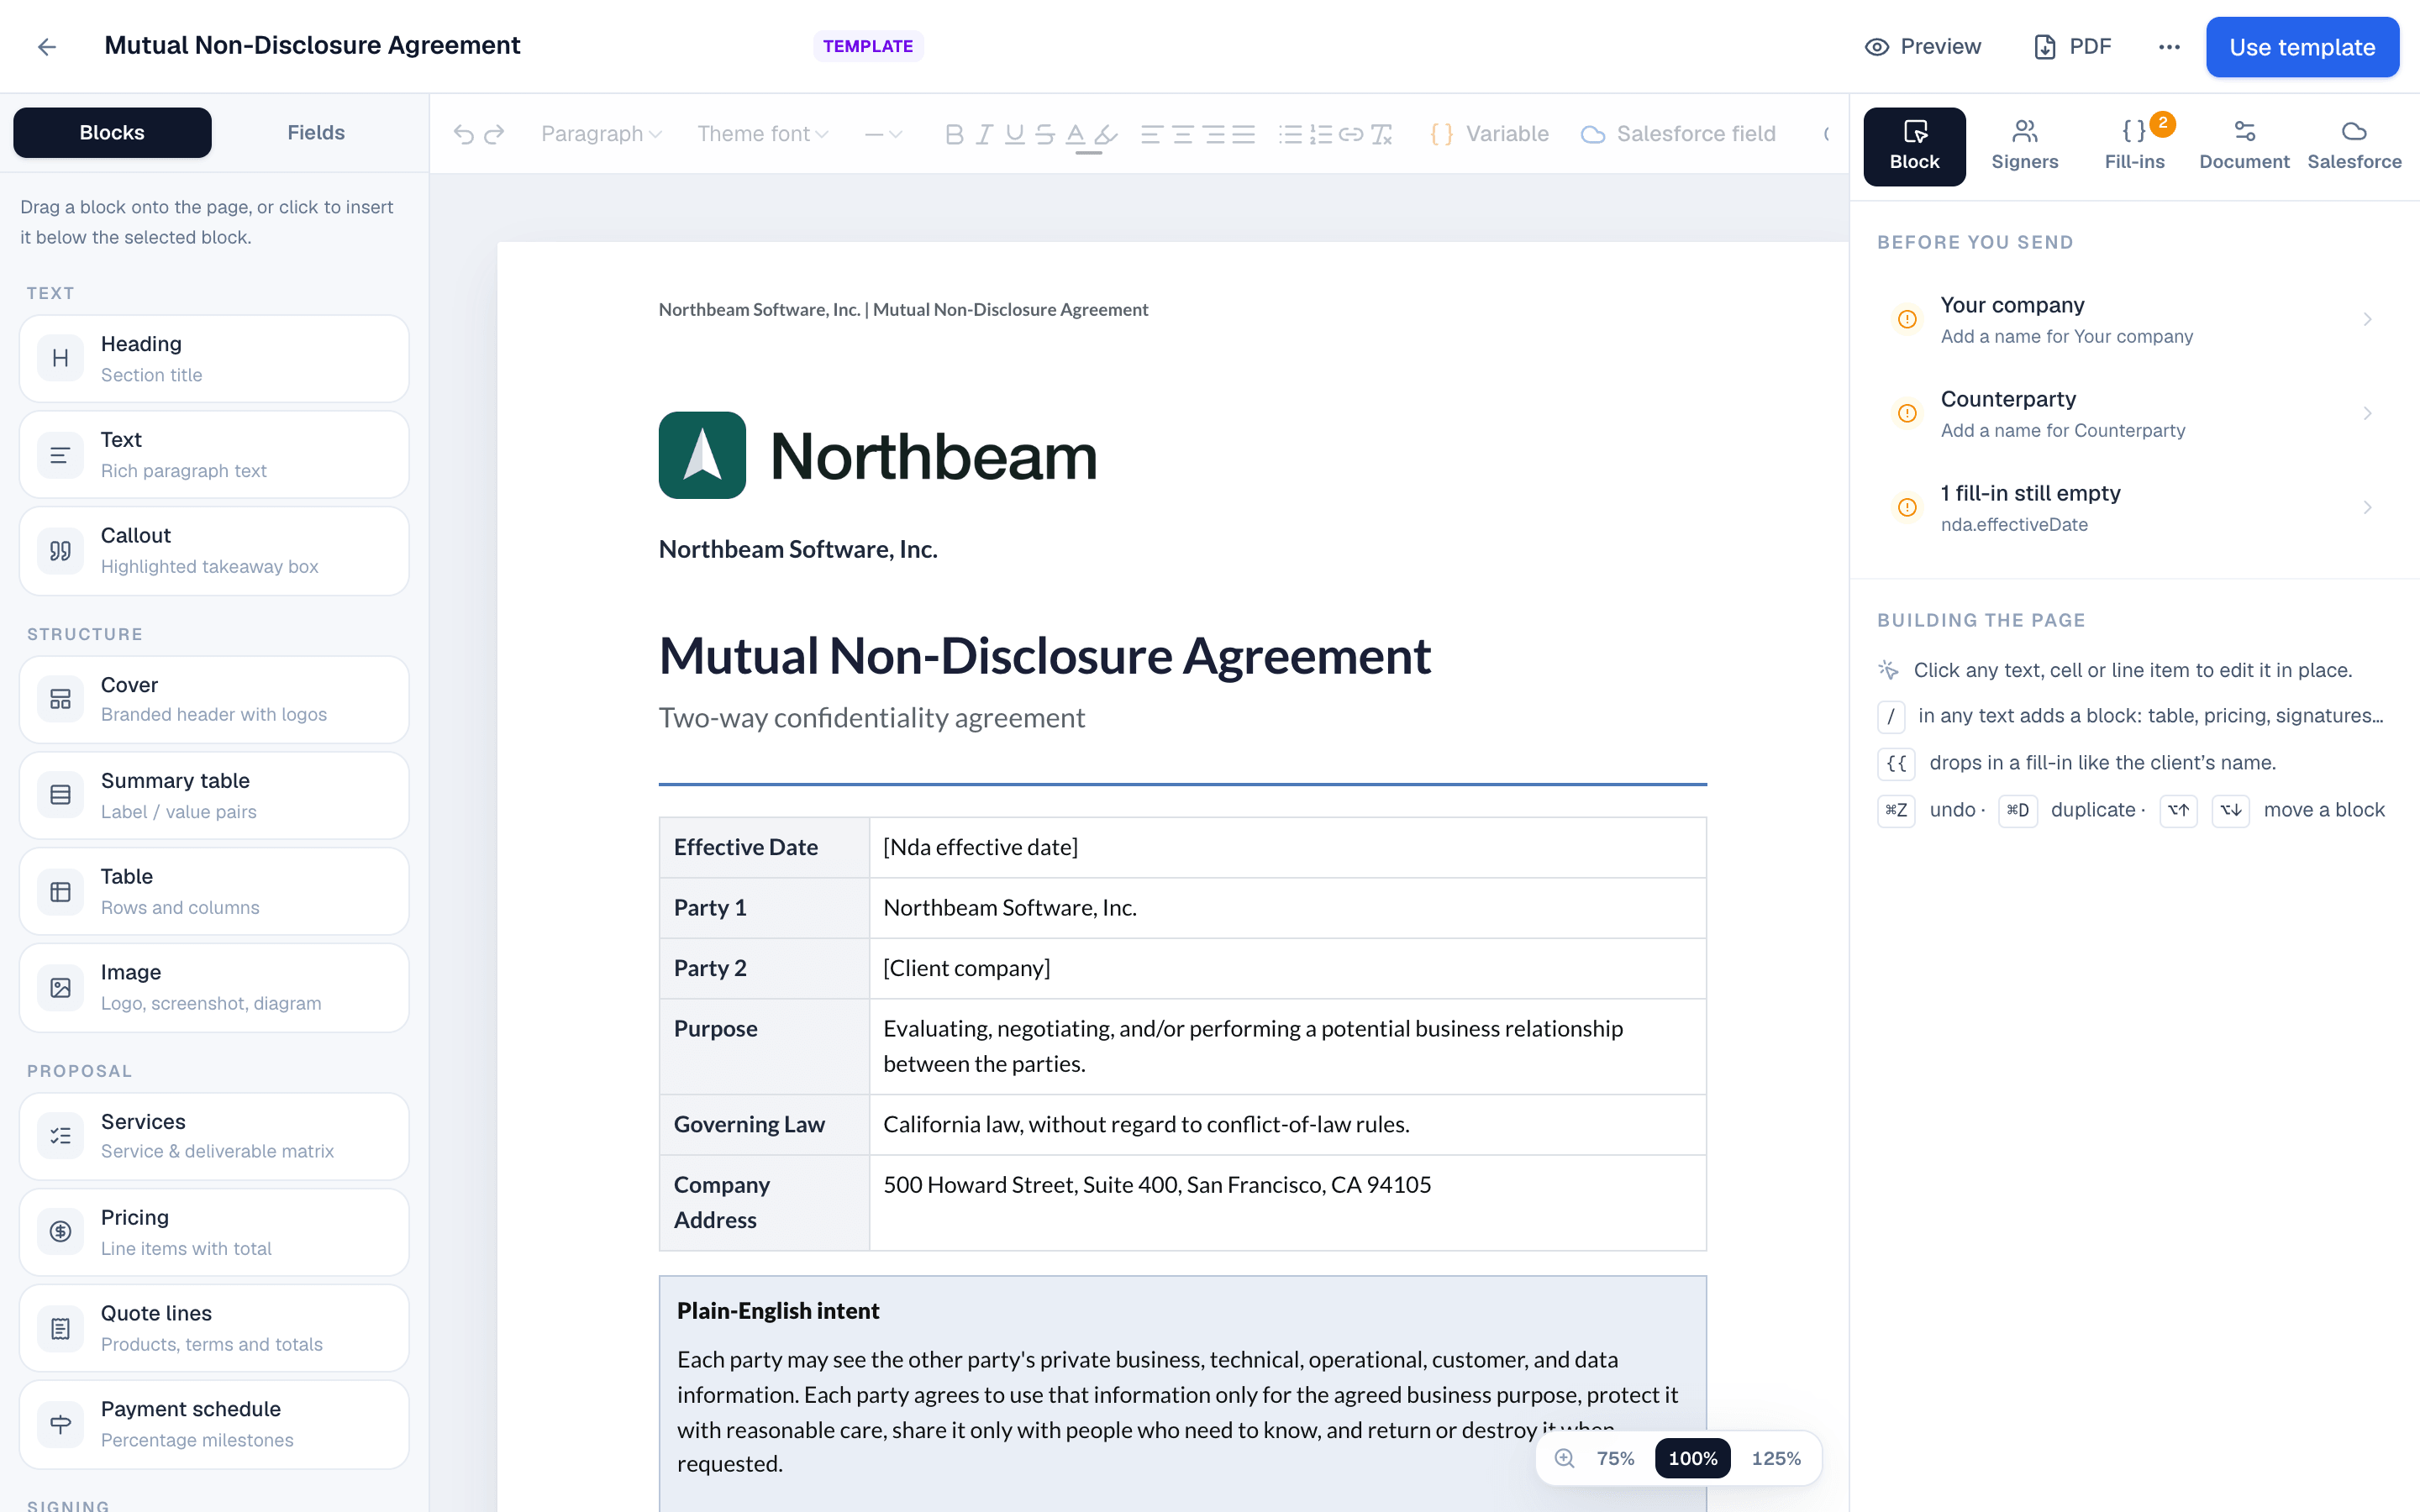
The editor has three columns:
- Blocks and Fields on the left. Drag a block onto the page, or click it to insert it below the selected block.
- The page in the middle. Click any text, cell or line item to edit it in place.
- The inspector on the right, with the Block, Signers, Fill-ins and Document tabs. A Salesforce tab appears once Salesforce is connected.
Edit and add blocks
Click a block to select it. A small toolbar lets you move, duplicate or delete it, and the Block tab shows its settings.
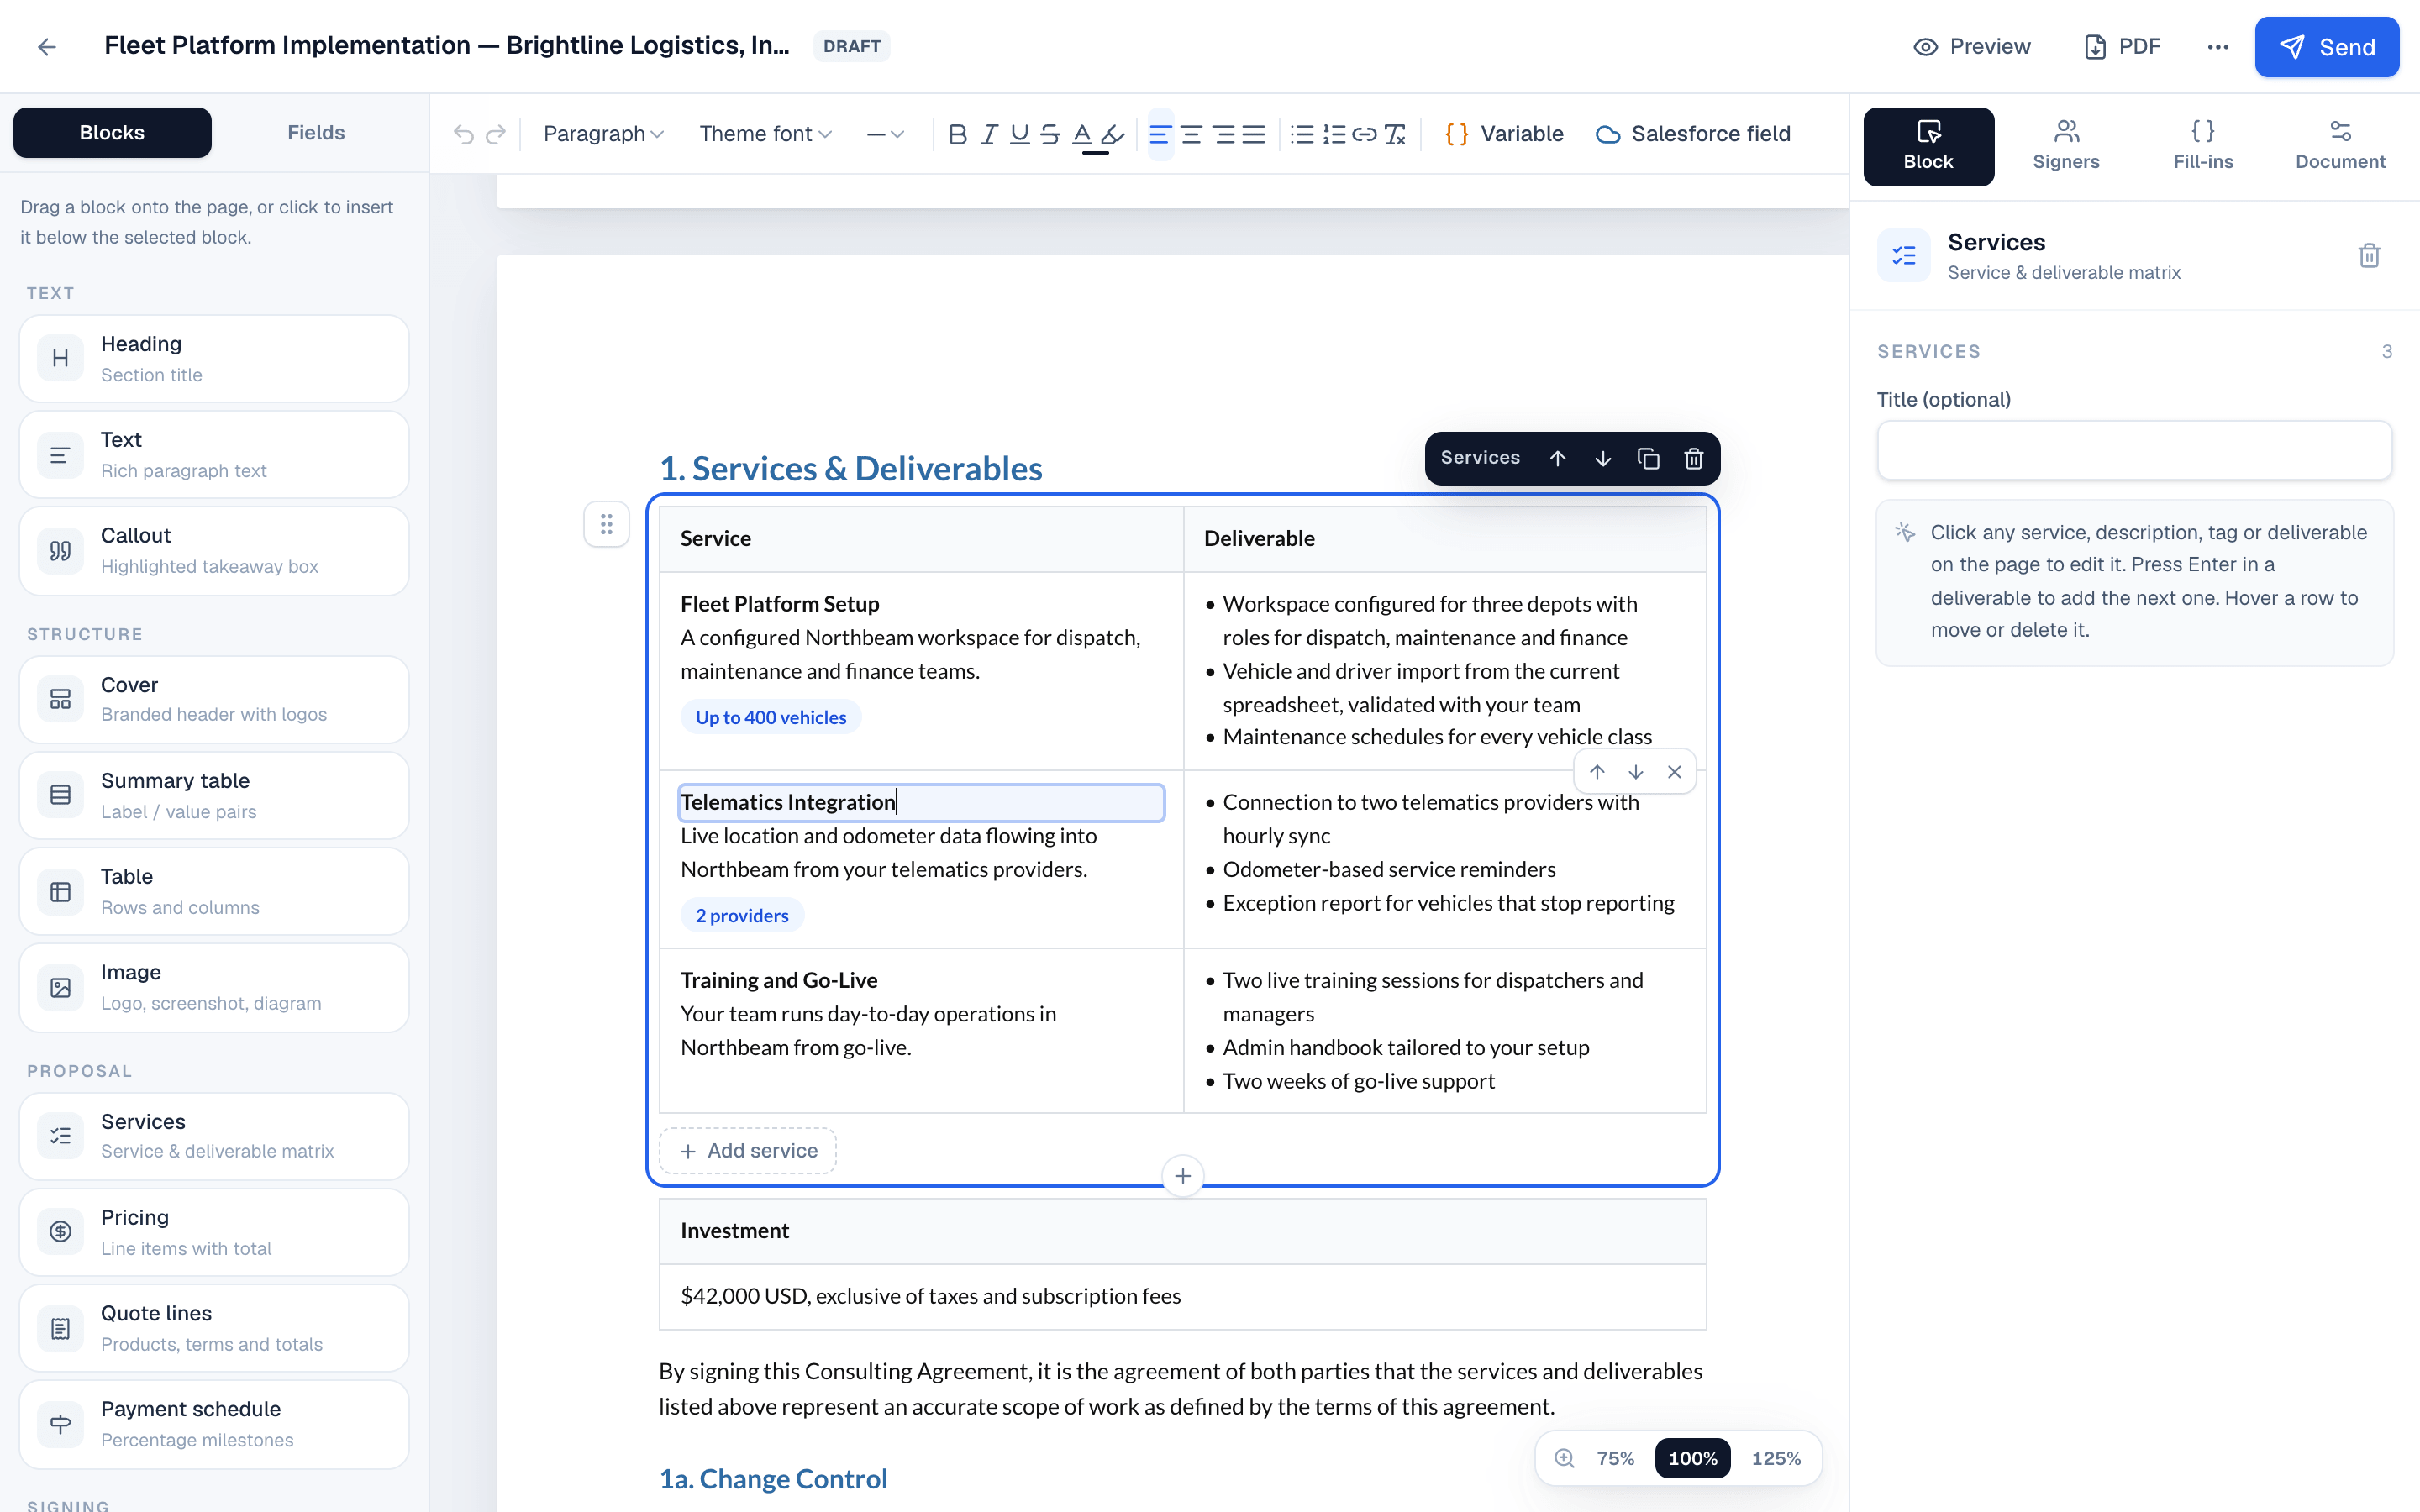
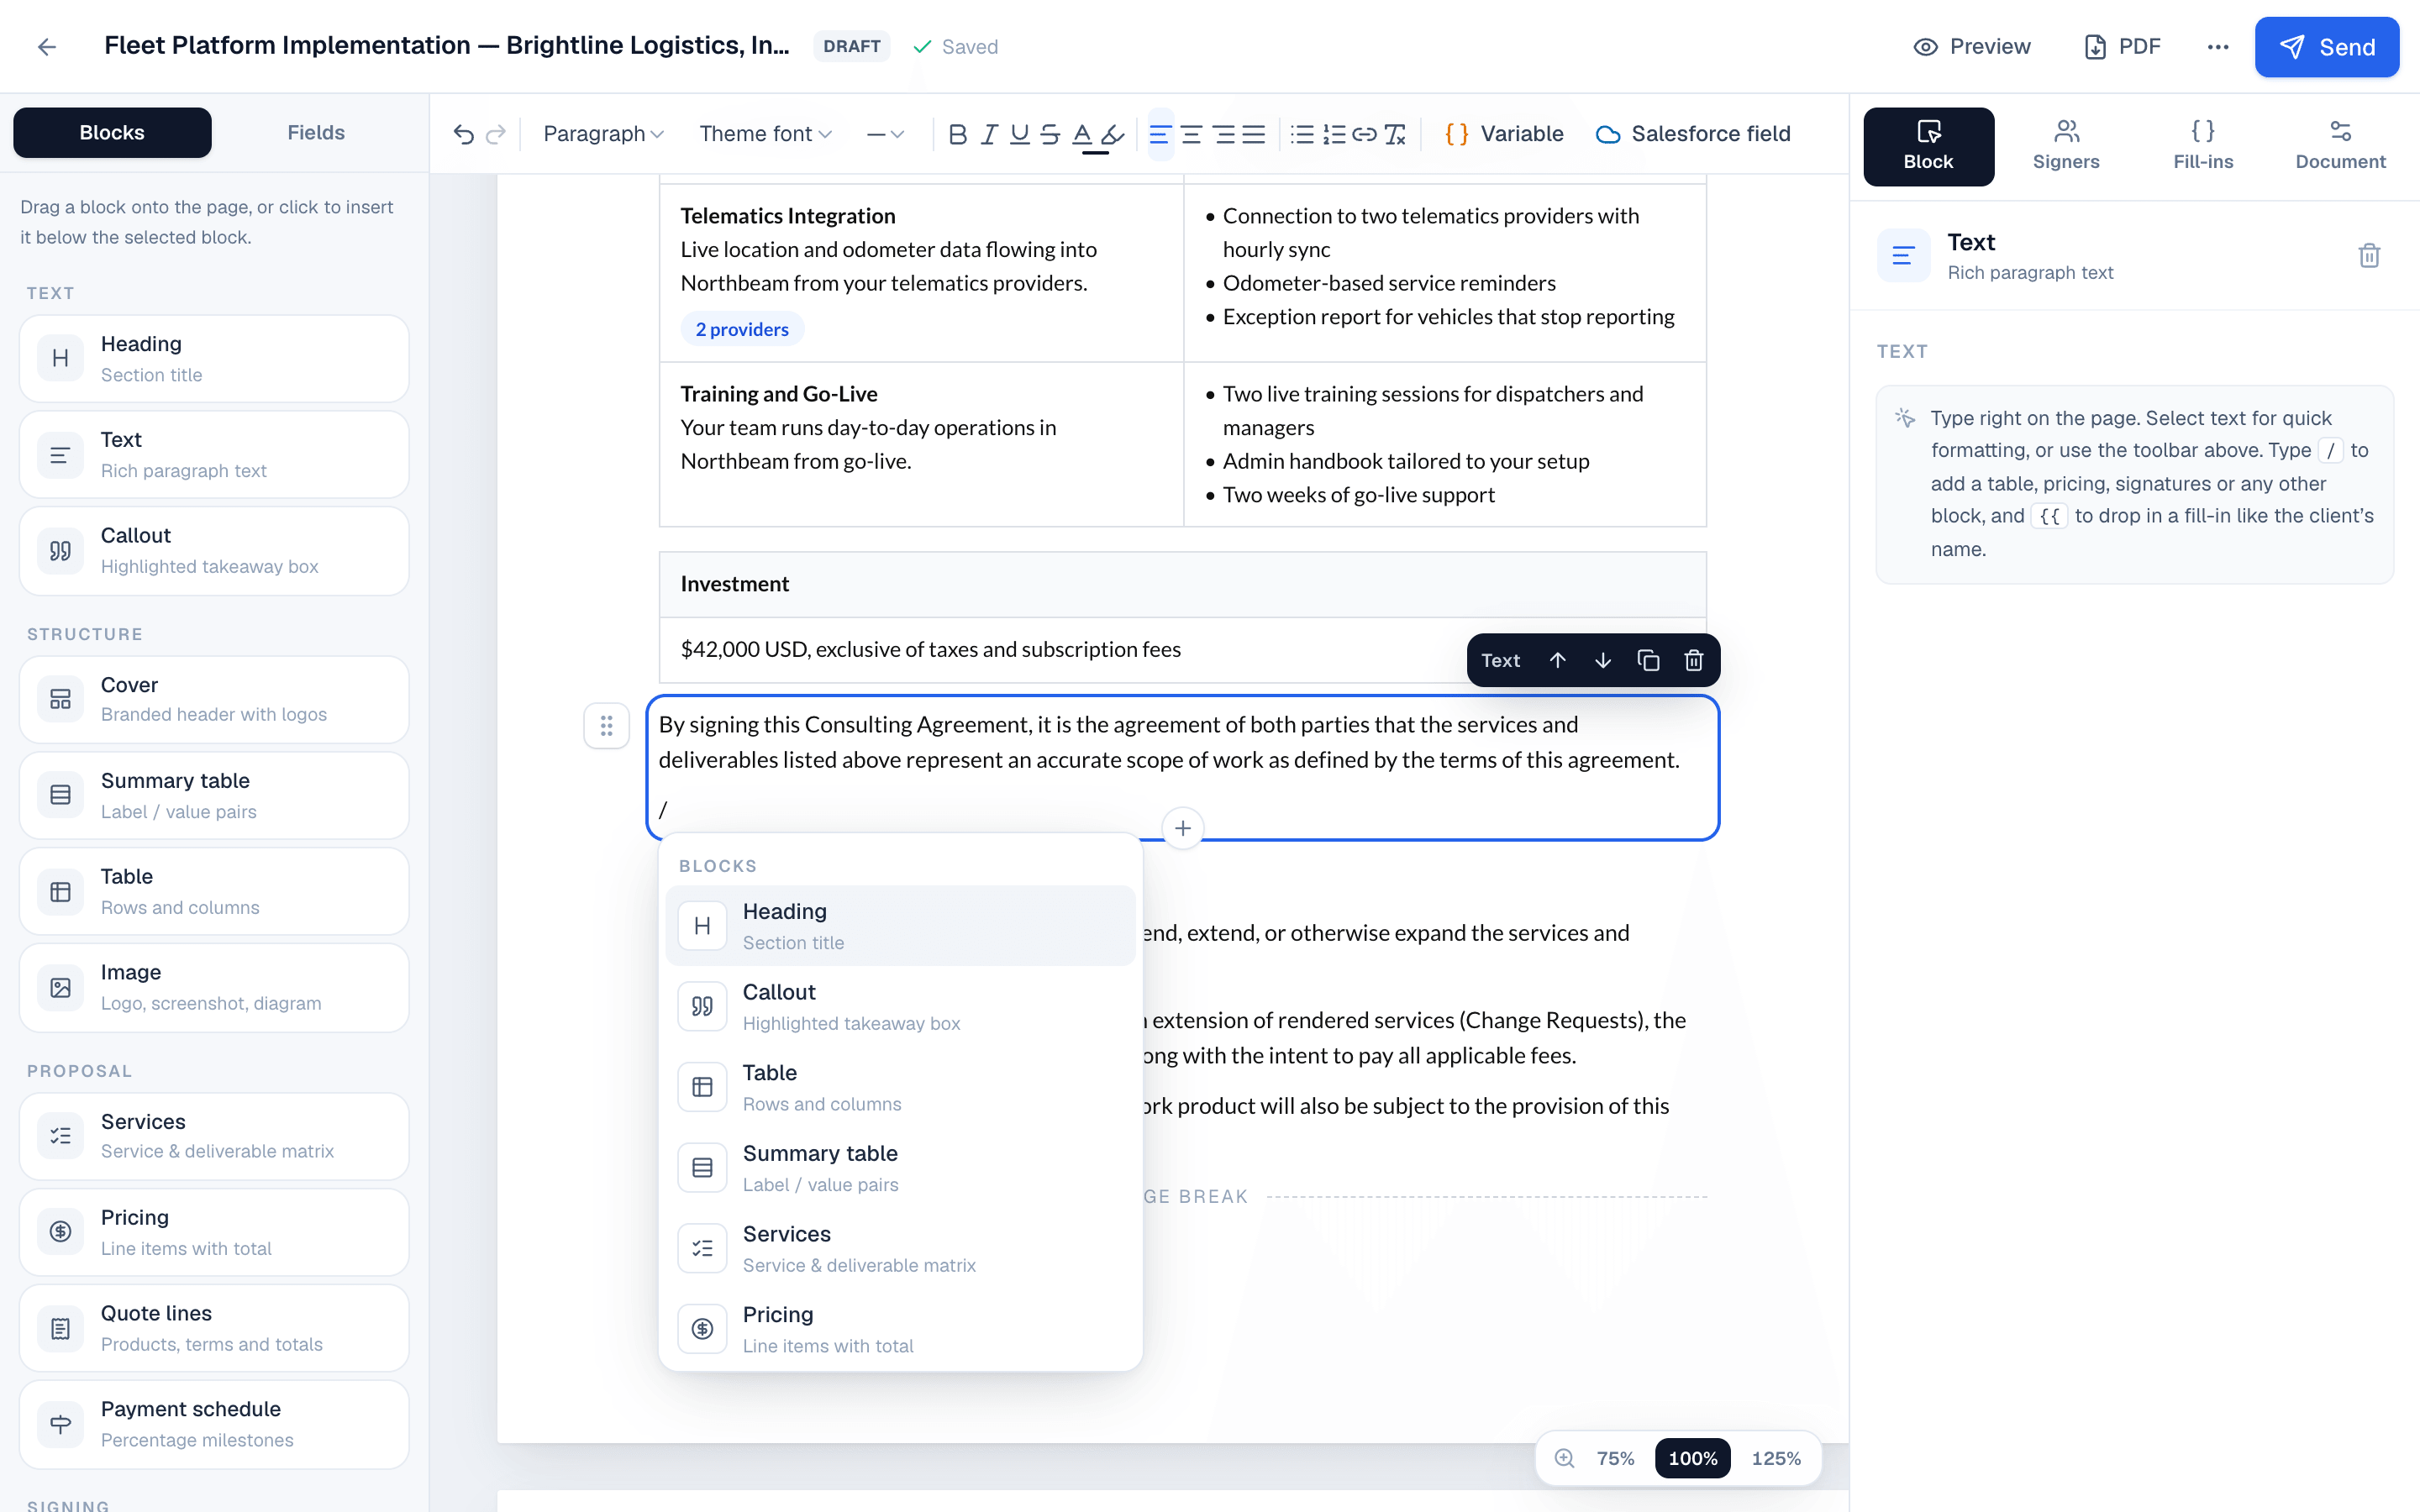
To add a block while typing, press / at the start of an empty line and pick from the menu: heading, callout, key details, table, pricing table, payment schedule, signature block and more.
| Shortcut | What it does |
|---|---|
/ | Add a block |
{{ | Insert a fill-in, such as the client's name |
⌘Z | Undo |
⌘D | Duplicate the selected block |
⌥↑ ⌥↓ | Move the selected block |
Place and resize fields
Open Fields on the left and pick who fills them in. Drag a field anywhere on the page, over text, a table or a signature block, and it stays exactly where you let go. It moves with the content around it when you edit the page. Clicking a field instead places it on the page in view.
While you drag, pink guide lines show when the field lines up with another one, and it snaps into line.
Click a field on the page to select it. Drag the handles on its right edge, bottom edge or corner to make it bigger or smaller. The Block tab shows its settings: type, who fills it in, label, required, and exact width and height. The signer sees the field at the size you set.
| Shortcut | What it does |
|---|---|
| Arrow keys | Nudge the selected field 1px (hold Shift for 10px) |
⌘D | Duplicate the selected field |
⌫ | Delete the selected field |
Esc | Deselect |
Fill-ins
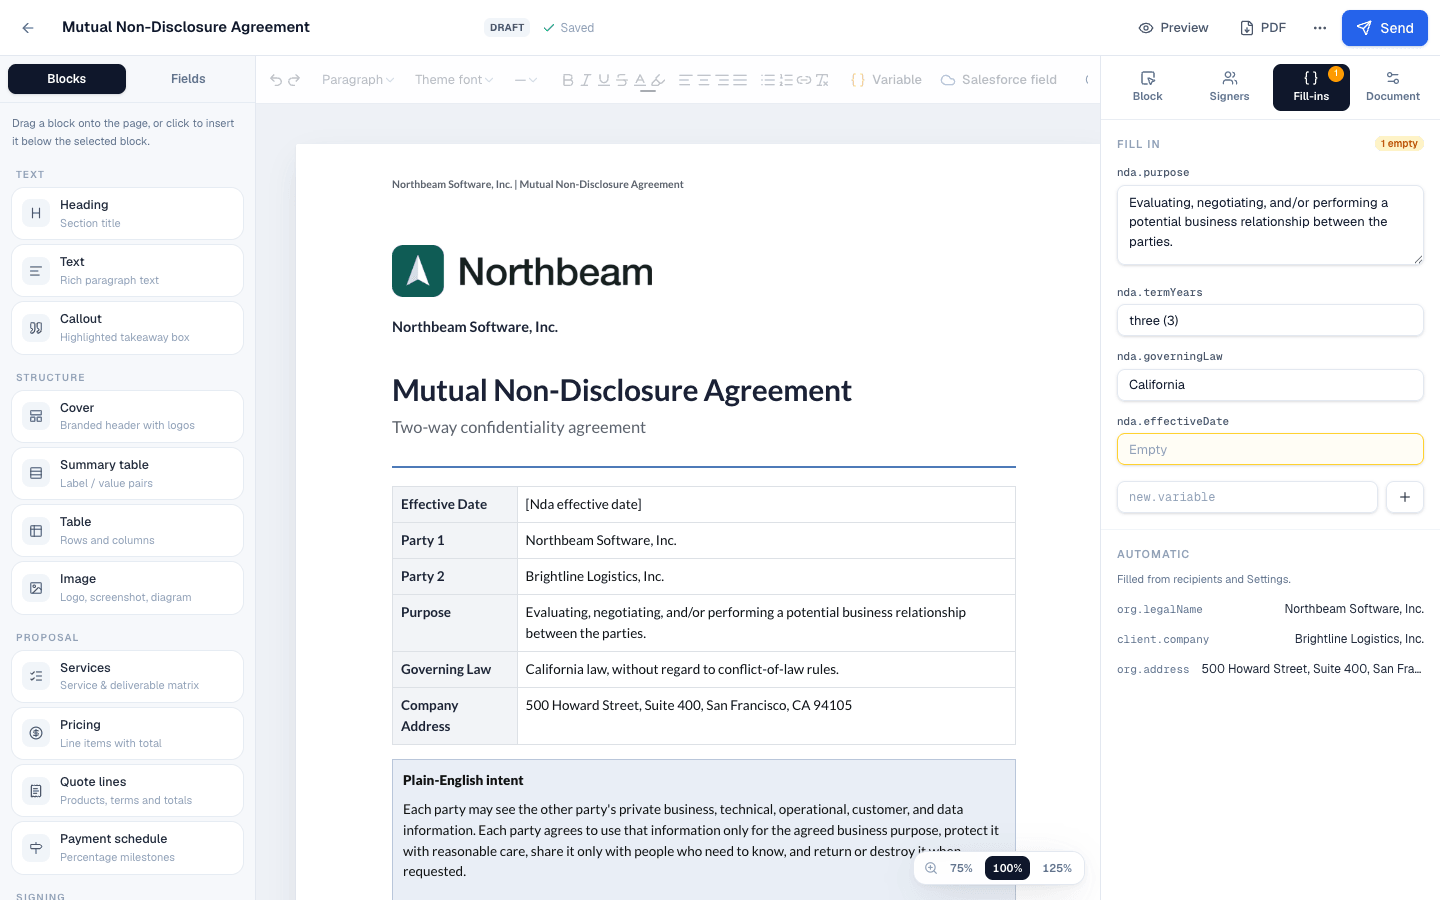
Fill-ins are values that change per document, written as {{name}}. Some fill themselves in: your company details come from Settings and signer details come from the recipients. Others you type per document, like an effective date.
Who signs
The Signers tab lists the roles in the template, for example Your company and Counterparty. Names and emails are filled in on each document.
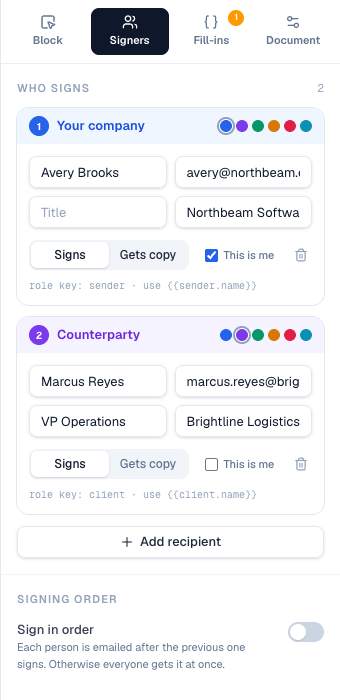
- Signs or Gets copy: signers sign; copy recipients receive the signed PDF.
- This is me: marks the role you sign as, so it's filled with the sender.
- Sign in order: each person is emailed after the previous one signs. Otherwise everyone gets it at once.
On the website: No CRM needed·Pricing